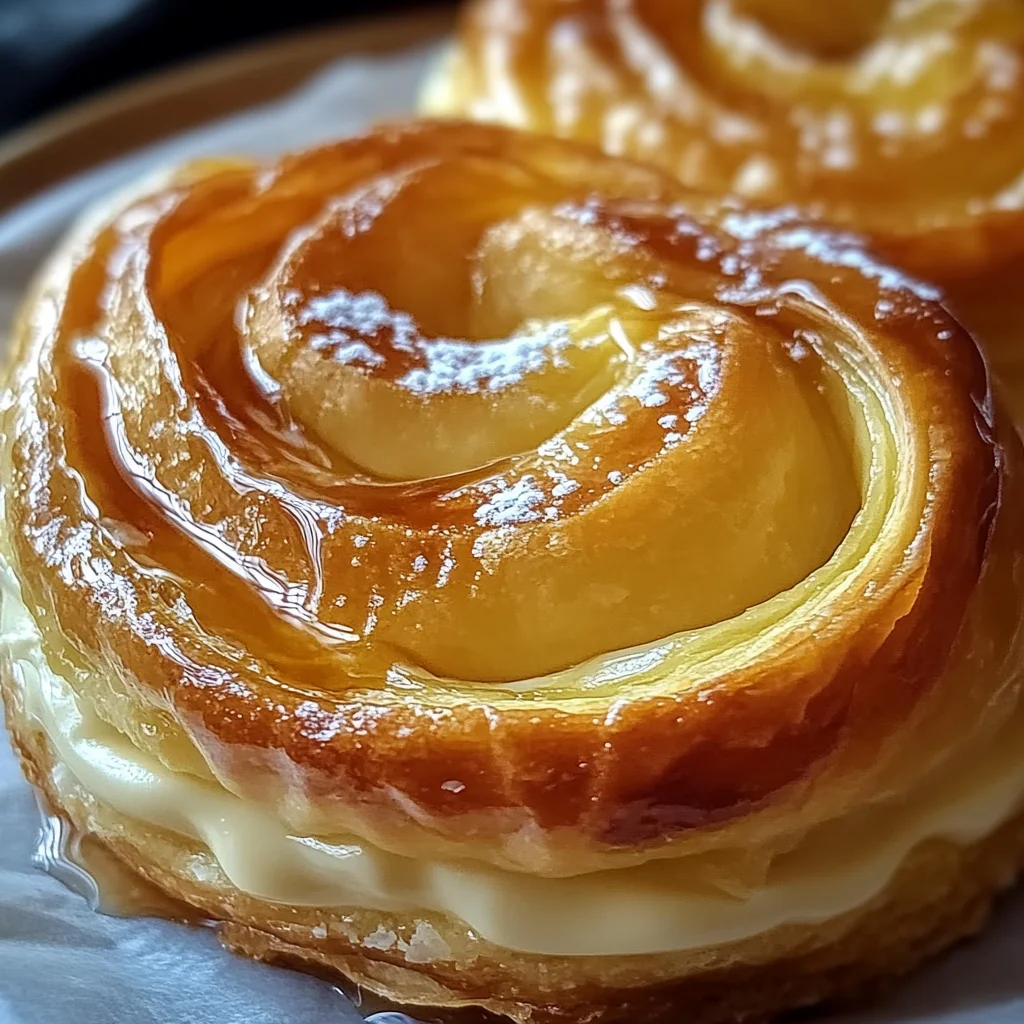
Experience the Heavenly Cheese Danish: A Luscious Creamy Delight to Bake, a delightful combination of flaky pastry and rich cream cheese filling. This recipe is perfect for brunch gatherings, special occasions, or simply as a treat for yourself. With its tender texture and sweet aroma, this cheese danish is sure to impress anyone who takes a bite!
Why You’ll Love This Recipe
- Irresistible Flavor: The creamy filling paired with the flaky pastry creates a heavenly taste experience.
- Versatile Serving Options: Perfect for breakfast, brunch, or dessert, making it suitable for any time of day.
- Easy to Make: With simple ingredients and straightforward steps, even novice bakers can master this recipe.
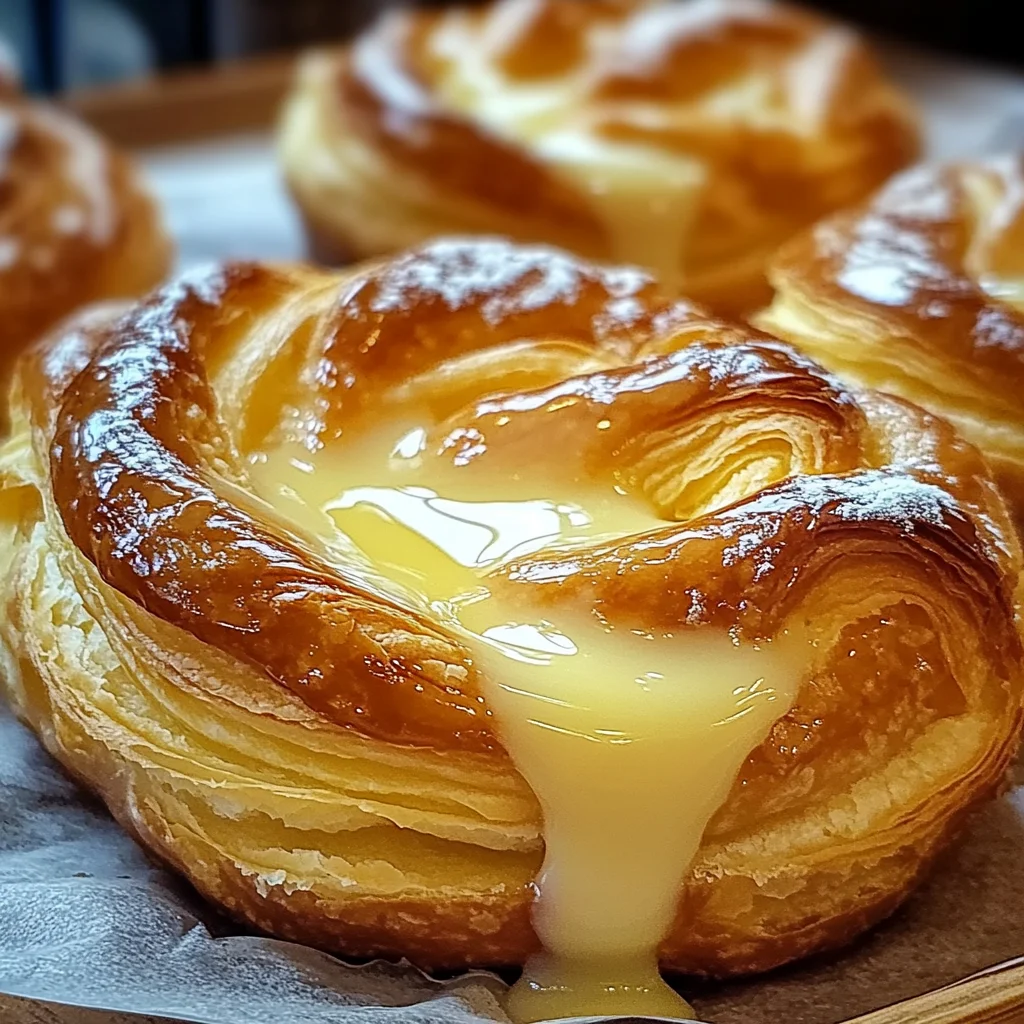
- Impressive Presentation: The twisted shape makes each danish look stunning on a serving platter.
- Make-Ahead Friendly: Prepare the dough in advance and bake fresh danishes when ready to serve.
Tools and Preparation
Before getting started with your Heavenly Cheese Danish, ensure you have the necessary tools on hand. Each tool plays a key role in achieving the perfect pastry.
Essential Tools and Equipment
- Mixing bowls
- Measuring cups and spoons
- Rolling pin
- Baking sheets
- Plastic wrap
- Whisk
Importance of Each Tool
- Mixing bowls: Essential for combining ingredients efficiently without spills.
- Measuring cups and spoons: Ensures accurate measurements for consistent results.
- Rolling pin: Helps achieve an even thickness for the dough, ensuring uniform baking.
- Baking sheets: Provides a sturdy surface for baking multiple pastries at once.
Ingredients
For the Heavenly Cheese Danish, gather these ingredients:
- 2 packages (1/4 ounce) active dry yeast
- 1/2 cup warm water (110° to 115°F)
- 4 cups all-purpose flour
- 1/3 cup granulated sugar
- 2 teaspoons salt
- 1 cup cold butter (cubed)
- 1 cup 2% milk
- 4 large egg yolks (room temperature)
- 3 teaspoons ground cinnamon
- 12 ounces cream cheese (softened)
- 1/3 cup sugar
- 1 large egg (separated)
- 1 tablespoon water
- 2 tablespoons maple syrup
How to Make Heavenly Cheese Danish: A Luscious Creamy Delight to Bake
Step 1: Activate the Yeast
Combine the yeast and warm water in a small bowl. Let it sit for about 5 minutes until foamy.
Step 2: Prepare the Dough Mixture
In a large mixing bowl, whisk together flour, sugar, and salt. Cut in the cold butter until the mixture resembles coarse crumbs. Stir in the milk, egg yolks, and the yeast mixture until a soft, sticky dough forms.
Step 3: Chill the Dough
Cover the bowl with plastic wrap and chill in the refrigerator for 8 to 24 hours.
Step 4: Shape the Pastry
Take the chilled dough and gently punch it down. Divide it into four equal portions on a floured surface. Pat each portion into a 9×4-inch rectangle. Sprinkle 3/4 teaspoon of cinnamon over each rectangle.
Step 5: Create Twists
Slice each rectangle lengthwise into four strips measuring about 9×1 inches. Take each strip and twist it before coiling it loosely around itself. Tuck the end under to seal.
Step 6: Make Cream Cheese Filling
In a bowl, beat together cream cheese, sugar (1/3 cup), and egg yolk until smooth. Make an indentation in the center of each coil, adding one rounded tablespoon of cream cheese filling into each indentation.
Step 7: Let Rise
Cover the baking sheets and let the pastries rise in a warm spot until they double in size; this should take about 45 minutes.
Step 8: Preheat Oven
Preheat your oven to 350°F while waiting for your pastries to rise.
Step 9: Brush with Egg Wash
Beat the egg white with water (1 tablespoon), then brush this mixture over each coil before baking.
Step 10: Bake
Place your pastries in the oven and bake for approximately 15 to 20 minutes until golden brown.
Step 11: Glaze with Maple Syrup
Remove from oven and immediately brush them with maple syrup for added sweetness.
Now you’re ready to enjoy your freshly baked Heavenly Cheese Danish!
How to Serve Heavenly Cheese Danish: A Luscious Creamy Delight to Bake
Heavenly Cheese Danish is not only a treat for the taste buds but also a feast for the eyes. Whether you’re serving them at a brunch gathering or enjoying them with your morning coffee, here are some delightful serving suggestions.
With Fresh Fruits
- Strawberries – Serve sliced strawberries on the side for a sweet and refreshing contrast.
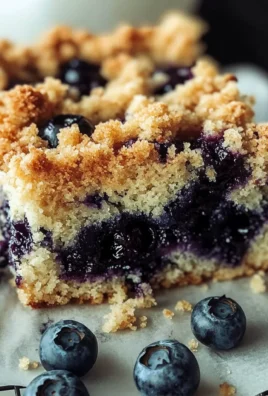
- Blueberries – Their burst of flavor complements the creamy filling beautifully.
With Coffee or Tea
- Espresso – The bold flavor of espresso pairs perfectly with the richness of the pastry.
- Herbal Tea – Choose a calming herbal tea to balance the sweetness of the cheese danish.
Drizzled with Chocolate
- Dark Chocolate Sauce – A drizzle of dark chocolate adds an indulgent touch, enhancing the overall experience.
- White Chocolate Ganache – For a sweeter option, white chocolate ganache can create a beautiful presentation.
Topped with Whipped Cream
- Homemade Whipped Cream – A dollop of fresh whipped cream provides a light and airy texture that contrasts the density of the danish.
- Flavored Whipped Cream – Consider adding vanilla or almond extract for an extra layer of flavor.
How to Perfect Heavenly Cheese Danish: A Luscious Creamy Delight to Bake
To achieve the best results with your Heavenly Cheese Danish, consider these helpful tips. They will enhance your baking experience and ensure perfect pastries every time.
- Use cold ingredients – Keeping your butter and milk cold helps create a flaky texture in your danish.
- Don’t rush chilling – Allowing the dough to chill overnight enhances its flavor and makes it easier to handle.
- Watch the oven closely – Baking times can vary; keep an eye on your pastries to prevent over-browning.
- Experiment with fillings – While cream cheese is classic, try adding fruit preserves or lemon zest for variety.
- Warm before serving – Gently warming the danishes right before serving can elevate their flavor profile and texture.
- Store properly – Keep leftover danishes in an airtight container at room temperature for optimal freshness.
Best Side Dishes for Heavenly Cheese Danish: A Luscious Creamy Delight to Bake
Pairing side dishes with your Heavenly Cheese Danish can enhance your meal. Here are some fantastic options that complement this delightful pastry.
- Fresh Fruit Salad – A mix of seasonal fruits provides brightness and balances sweetness.
- Yogurt Parfait – Layered yogurt with granola and berries offers creaminess alongside crunch.
- Granola – Crunchy granola adds texture and nutty flavors that pair well with creamy pastries.
- Smoothie Bowl – A smoothie bowl topped with nuts and seeds creates a refreshing contrast to rich danish.
- Savory Quiche – A slice of quiche adds protein and savory notes, making it perfect for brunch settings.
- Green Salad – Light greens dressed in vinaigrette offer a fresh counterpoint to rich desserts.
Common Mistakes to Avoid
Baking the perfect Heavenly Cheese Danish can be tricky. Here are some common mistakes and how to avoid them:
- Not measuring ingredients accurately: Make sure to use proper measuring cups and spoons. A small error can lead to a dough that is too dry or too wet.
- Skipping the chilling time: Chilling the dough is essential for achieving a flaky texture. Don’t rush this step; allow at least 8 hours in the fridge.
- Overworking the dough: Handle the dough gently to maintain its flaky layers. Overmixing can make it tough, so stop once it’s combined.
- Ignoring oven temperature: Always preheat your oven properly before baking. An incorrect temperature can result in unevenly baked pastries.
- Not allowing pastries to rise: Be patient and let the pastries double in size before baking. This step is crucial for achieving that light, airy texture.
Storage & Reheating Instructions
Refrigerator Storage
- Store any leftover Heavenly Cheese Danish in an airtight container.
- They will last for up to 3 days in the refrigerator.
Freezing Heavenly Cheese Danish: A Luscious Creamy Delight to Bake
- Wrap each pastry individually in plastic wrap and then place them in a freezer-safe bag.
- They can be frozen for up to 2 months.
Reheating Heavenly Cheese Danish: A Luscious Creamy Delight to Bake
- Oven: Preheat your oven to 350°F and bake for about 10 minutes until warmed through. This will help retain their flaky texture.
- Microwave: Heat on medium power for about 20-30 seconds. Be careful not to overdo it, as this may make them chewy.
- Stovetop: Place on a skillet over low heat, covering with a lid until warmed through, which helps keep the pastry crisp.
Frequently Asked Questions
Here are some common questions about making Heavenly Cheese Danish.
How do I ensure my Heavenly Cheese Danish turns out flaky?
To achieve a flaky texture, make sure your butter is cold when mixing it into the flour. Also, remember not to overwork the dough.
Can I use different fillings for my Heavenly Cheese Danish?
Absolutely! You can customize your filling by adding fruits like blueberries or cherries or using flavored cream cheese spreads.
How do I know when my Heavenly Cheese Danish is done baking?
Your pastries should be golden brown on top and should spring back slightly when touched. If they look pale, give them a few more minutes.
What can I serve with Heavenly Cheese Danish?
These pastries pair wonderfully with fresh fruit, whipped cream, or a drizzle of icing for added sweetness.
Final Thoughts
Heavenly Cheese Danish is not just delicious but also versatile. Its flaky pastry combined with creamy filling makes it an ideal treat for any occasion. Feel free to experiment with different fillings or toppings to customize this delightful recipe!
Heavenly Cheese Danish: A Luscious Creamy Delight to Bake

Indulge in the Heavenly Cheese Danish: A Luscious Creamy Delight to Bake, a perfect pastry that combines a flaky exterior with a rich cream cheese filling. Ideal for brunch gatherings or as a sweet treat to enjoy any time of day, this delightful danish is sure to impress your friends and family. With simple ingredients and straightforward steps, even novice bakers can create these beautiful pastries that promise an irresistible flavor and impressive presentation. Plus, they can be prepared ahead of time for ultimate convenience. Treat yourself to this heavenly dessert today!
- Prep Time: 30 minutes
- Cook Time: 20 minutes
- Total Time: 50 minutes
- Yield: Approximately 12 servings 1x
- Category: Dessert
- Method: Baking
- Cuisine: American
Ingredients
- 2 packages active dry yeast
- 1/2 cup warm water
- 4 cups all-purpose flour
- 1/3 cup granulated sugar
- 2 teaspoons salt
- 1 cup cold butter (cubed)
- 1 cup milk
- 4 large egg yolks
- 3 teaspoons ground cinnamon
- 12 ounces cream cheese (softened)
- 1/3 cup sugar (for filling)
- 1 large egg (separated)
- 1 tablespoon water
- 2 tablespoons maple syrup
Instructions
- Activate the yeast by combining it with warm water; let it sit until foamy.
- In a mixing bowl, whisk flour, sugar, and salt; cut in butter until crumbly. Stir in milk, egg yolks, and yeast mixture to form a soft dough.
- Chill the dough covered for 8 to 24 hours.
- Shape the chilled dough into rectangles; sprinkle with cinnamon and twist into coils.
- Prepare cream cheese filling by mixing softened cream cheese, sugar, and egg yolk until smooth; fill each coil.
- Allow pastries to rise before baking at 350°F for 15 to 20 minutes until golden brown.
- Brush with maple syrup after baking.
Nutrition
- Serving Size: 1 serving
- Calories: 300
- Sugar: 10g
- Sodium: 150mg
- Fat: 18g
- Saturated Fat: 11g
- Unsaturated Fat: 6g
- Trans Fat: 0g
- Carbohydrates: 27g
- Fiber: 1g
- Protein: 5g
- Cholesterol: 60mg
Leave a Comment